
GA4 Path Exploration
Discover how to use the GA4 Path Exploration report to uncover insights into your website’s user behaviour.


Discover how to use the GA4 Path Exploration report to uncover insights into your website’s user behaviour.
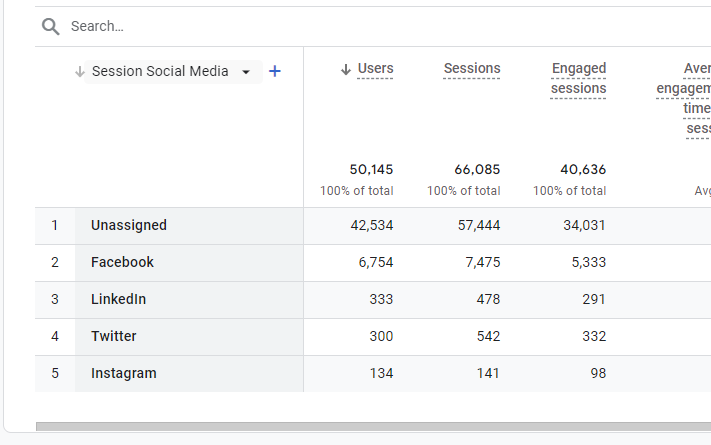
Are you seeing Unassigned in GA4 – what does it mean? How can you fix it?