
Setup GA4 via Google Tag Manager
Learn how to configure Google Analytics 4 using Google Tag Manager with our clean, step-by-step implementation guide.
Have you ever looked at your Google Analytics 4 (GA4) reporting and spotted random traffic from a internal staging server, or perhaps a bizarre spam domain?
It is incredibly frustrating.
Clean data is the absolute foundation of any intelligent digital marketing strategy, yet keeping it pristine often feels like a constant uphill battle for busy marketing managers.
Fortunately, Google has rolled out a brilliant feature within the filtering options of the GA4 admin section.
This update makes blocking unapproved domain traffic before it ever reaches your reports much cleaner and simpler than previous workarounds.
Protect your data integrity: GA4’s web host name filter prevents unwanted traffic from skewing your production reporting.
Target the main culprits: Use this feature to easily eliminate traffic from staging environments, content scrapers, and measurement protocol spammers.
Always test first: Deploy the filter in ‘Testing’ mode and use an Exploration report to validate it before going live.
Look forward, not back: Data filters are not retroactive; they only apply to new data moving forward.
There are four main troublemakers that this new filter is designed to handle.
When web developers duplicate your live website to create a staging or testing environment, they often copy the production GA4 tracking code right along with it.
If anyone tests the staging site, that data flows directly into your live analytics property, heavily distorting your real user metrics.
Scrapers frequently steal website content and republish it on entirely different domains.
When they do this, they often scrape your tracking snippet too. Suddenly, you will see your traffic data merging with views from a completely unrelated domain.
Spammers can sometimes send fake hits directly to your GA4 Measurement ID using the Measurement Protocol without ever actually visiting your website.
This results in ghost traffic that muddies your reports.
You might want to block specific sub-domains on your own site.
For instance, if you have a client portal or an internal resources page that clients use daily, you may want to filter that out to keep your core GA4 property strictly focused on marketing traffic.
This won’t block referral traffic that you don’t want to see e.g. from China / Singapore bot traffic as an fyi.
Setting this up is remarkably straightforward and can be completed entirely within the GA4 user interface.
Here is your step-by-step implementation guide.
Log into your GA4 account and navigate to the Admin panel in the bottom left corner. Under the Data collection and modification menu, click on Data filters, and then click the blue Create filter button.
You will be presented with three choices. Select Web host name filter.
Give your filter a highly specific name so you and your team know exactly what it does later (for example, “Exclude Dev and Staging Sites”).
The filter operation is automatically locked to Exclude, which ensures this traffic is blocked entirely.
Next, choose your matching criteria.
You can select:
For example, you might set the condition to contain dev.youragency.com or staging.youragency.com.
You can easily add multiple conditions to catch all your unwanted environments in one go.
You cannot use regex at the moment.
This is a critical step (unless you like to fly by the seat of your pants).
You have the option to set the filter state to either Testing or Active.
Select Testing and hit save.
Once your filter is in testing mode, you need to wait roughly 24 to 36 hours for enough data to build up before you attempt to validate it.
To confirm it is working correctly, you will need to build a quick validation report using GA4 Explorations.
If your filter is working properly, the resulting table will show event counts next to the unwanted host names you targeted.
This confirms that GA4 is successfully catching and flagging this traffic for exclusion behind the scenes.
Review the list carefully to make sure no legitimate marketing domains are being caught by mistake.
If everything looks pristine in your validation report, it is time to make the filter permanent.
Head straight back to your Admin panel, click into Data filters, open your test filter, change the state to Active, and click save.
There is one vital caveat to bear in mind: data filters only apply to new data moving forward.
They will not retroactively alter or clean up the historical data already sitting in your reports.
As a proactive pro-tip, it is a great idea to build a separate, permanent Exploration report matching Host name against Event count.
Checking this once a month allows you to spot any new rogue domains or scraper sites creeping into your analytics early.
Final Thing
Don’t forget to annotate your analytics property when this is set to active for referencing later on.
Can I use host name filters to clean up historical data in GA4?
No. Data filters in GA4 are strictly forward-facing. They only filter out traffic from the exact moment you set them to active. Any historical spam or staging traffic will remain in your past reports. You can filter and customise your reports to remove these if you need to.
What is the difference between ‘Testing’ and ‘Active’ filter states?
When a filter is in ‘Testing’ mode, GA4 collects the data as normal but attaches a dimension dimensionally flagging it as test data.
This allows you to verify the filter works via Explorations. When set to ‘Active’, the matching data is permanently dropped and never processed.
Will blocking a host name affect my website’s SEO ranking?
Not at all. GA4 data filters only control how data is collected and visualised within your analytics platform. They have zero impact on how search engines crawl, index, or rank your actual website.

Learn how to configure Google Analytics 4 using Google Tag Manager with our clean, step-by-step implementation guide.

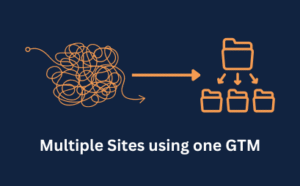
Learn how to consolidate multiple domains into a single Google Tag Manager container and save hours of administrative work.


Learn how to implement the Meta Pixel in Google Tag Manager using the Stape template.
Author
Hello, I'm Kyle Rushton McGregor!
I’m an experienced GA4 Specialist with a demonstrated history of working with Google Tag Manager and Looker Studio. I’m an international speaker who has trained 1000s of people on all things analytics.